Saturday, 22 February 2014

Cheery Cherries and Chunky Jars!

So I was eyeing this jar since I had bought it. Less for the cherries it held within and more for its chunkiness and all I could use it for once it was empty.
I had come across this recipe at one of my favourite blogs Averie Cooks. It somehow always reminds me of Dr. Averie from Grey's Anatomy. So back to the recipe. Apparently it was a bit of an heirloom handed down from her grandma through her mom and according to her, could have been changed down the line.
Here I am, picking up a family tradition and on my way to be utterly sacrilegious about it all.
It was meant to be made out of red maraschino cherries and my chunky jar had... wait for it...

BLACK!
Willing to commit a crime as heinous as twisting grandma Averie's much loved sweet, soft bread made out of luscious red cherries and a pink glaze, I turn everything rather mauve-ish.
So starting out with the recipe itself, here is where Averie cooks the luscious Cherry Bread a-la Grandma. And then I barge in!

The Chopping of cherries led to liberal snacking on a few and then chopping some vehemently as I thought of the mini list of people I don't like nowadays. Helped get through the monotonous chopping, time does fly by when you're having fun after all!
The syrup they came in was perhaps runnier than the red maraschino ones so I added a little less than half a cup of flour and half a teaspoon of baking powder. One can add more sugar to keep the proportion intact though I didn't and it turned out decent. 


 However, howEVER, the confectioner's sugar ratio needs to go up in the glaze for sure. I used exactly a cup and a half and it wasn't enough, though in my lovely Av's defence, the recipe did ask for 1 1/2 + cups (and that too for red cherries, the syrup I' assuming is much less runnier than the one black ones come with) so maybe I should've added more till the glaze got hazed...


Baking time in my moody oven and the capricious Pakistani gas supply was actually just above 40  minutes which was quite alright. The recipe does not warn against absolutely delectable aroma engulfing your kitchen and sending you to bread heaven. Very serious warning. 

It was perhaps the extra baking powder that formed the continental drift kind of crater on top but this baby came out so yummy, my guinea pig (appointed by force) gave me a gold star!

Also I read on her blog to not copy the recipes so I'm sharing the link again as I did earlier. I just changed the type of cherries since 
a) I am not too fond of pink, more of a plum girl at heart
b) These were the only ones I had at home! :)

Packed away the big loaf in cling wrap for later and the thin loaf (leftover batter, just in fear of the probable bread bubbling over, which was a false alarm) for snacking through the night as I look forward to an all-nighter movie-marathon. Yay for Weekend Baking!


Thursday, 6 February 2014

One Muppin Two Muppin Morning Toast

So we came across a forced day off in the form of Kashmir Day bang in the middle of the work week. This is when the body rejoiced at an opportunity to relax and the brain screeched at the waste of precious working hours this time of the year!
I had bought my first tart cups/ muffin tray a couple of weeks ago. Never baked cupcakes, muffins or tarts I wanted to give it a try.
I had also picked up a packet of Betty Crocker's Mix Berry Muffin Mix to "see how it goes"
The lazy Wednesday morning called for a baking session that turned simpler than spelling out "Ubiquitous Culinary Adventure Craving" for most. Popped a piece of chocolate on top that was leftover from the Roulade last weekend. Yes. Chocolate can go to waste in my house since I'm not much of a chocolate fan. I like it. Just like it. (okay this one can get me killed but I decided to go out on a limb and say it out in public)
The base became darker than the top but I conveniently blame the oven for that. 
Perhaps I should've preheated it for longer than 2.5 minutes. They turned out delectable, end to end took an entire 20 minutes, including the tearing of the packet and searching for a suitable spoon to mix water in along with a few phone calls attended on the side.
Not too bad eh?
The darkened derrieres summoned the name Morning Toast.
Yes we all love Nuz aunty and her burnt toast each morning. It is an essential morning ritual 
Gearing up to use my muffin tray more often.
Yay!

Monday, 3 February 2014

Chocolate Roulade with Cherries and love


I picked this up quite a while back from some blog. Don't recall where (Thank you mystery blogger!). I just added maraschino cherries to the whipped cream to it. Also replaced tea towels with wax paper. Don't fancy dirty cloth as much. Prefer throwing away wax paper.
Made for a great after dinner dessert and the morning after breakfast though is best eaten the same day. The whipped cream stays cloudy enough to make you feel like Mary Poppins bobbing around, hand cozily tucked away in the crook of her umbrella.
 A very Happy Saturday spent baking and (softly) snoring!!

-------------------------------------------------

Heavenly Chocolate Cake Roll Adapted from Jean Hewitt for The New York Times, June 8, 1975

Every time I have a slice of this cake, I wonder why we don't make it more often. The realm of flourless cakes tends to be populated with brick-like truffle cakes but this one manages to be intensely chocolaty but also featherlight. They also tend to be flooded with butter and while you will never hear me complain about the presence of butter in a cake, the absence of it in this cake allows it to almost float away. We can't let that happen, so it is anchored it with the most minimal frosting we know, whipped cream. The cold sweet cream against the airy bittersweet cake is, as far as I'm concerned, perfection itself. And it doesn't exactly hurt that the cake looks like a pinwheel. Or a Yodel. Or a Ho-Ho. You know, whatever your poison may be.

[Updated 5/9/11: To clarify some cake rolling confusion, pointed out by a helpful commenter. The prior directions had you roll the cake with a piece of waxed paper underneath, towel on top. In hindsight, the cake is much easier to roll with a towel underneath, as my photos show. Apologies to anyone who ended up with (delicious) cake chips because of this!]

Cake layer: 6 ounces semisweet bittersweet chocolate, chopped or 1 cup semi- or bittersweet chocolate chips 3 tablespoons water or strong coffee 6 large eggs, at room temperature, separated 2/3 cup sugar 1/4 teaspoon table salt 2 tablespoons unsweetened cocoa powder, divided
>
> Filling: 1 cup heavy or whipping cream 2 to 3 tablespoons powdered sugar (use more if you prefer a sweeter filling) 1/2 teaspoon vanilla extract or 1 to 2 tablespoons liqueur of your choice, such as Grand Marnier

Preheat oven to 350°F. Butter or oil a 10-by-15-inch shallow baking or jellyroll pan. Line the bottom lengthwise with a piece of waxed or parchment paper that extends up the short sides one inch.

Melt chocolate with water or coffee in a small saucepan over very low heat until it is 75 percent melted. Remove from heat and stir until the remaining chocolate is smooth. Set aside to cool slightly.

Beat egg yolks with an electric mixer until pale and creamy. Add sugar gradually, and continue to beat until yolks are pale and ribbony. Gently stir the chocolate into the yolk mixture.

In a clean bowl with clean beaters, beat egg whites with salt until they hold stiff peaks. Stir 1/4 of egg white mixture into the chocolate-yolk mixture to lighten it. Fold the remaining whites into the cake batter in three additions. Pour batter into prepared pan and smooth top. Bake in preheated oven for 15 minutes, or until cake layer feels dry (but very soft) to the touch and a toothpick inserted into the center comes out clean. It will still seem a little underbaked.

Transfer to a cooling rack and cover the top with a light damp towel or two layers of damp paper towels for 10 minutes. Gently remove towels; don't fuss if they have a bit of cake stuck to them. Run a knife around the edges of the cake. Sift one tablespoon cocoa over the top of the cake and cover the cake with a thin tea or flour sack towel [Updated, see Note above] that is a little longer than the pan. Place the back of a baking sheet or a large flat tray over the towel and invert the cake and paper onto it. Gently peel back the parchment or waxed paper that lined the pan. Sift the remaining tablespoon of cocoa powder over the top of the cake (that was, one minute ago, the underside). Using the towel underneath to help lift and roll the cake, roll the cake from short end to short end with the towel inside. Let cool completely, encased in its towel.
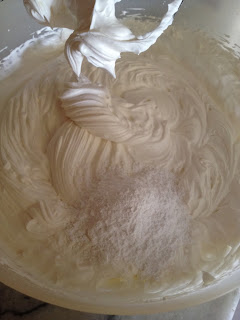
Once cool, beat heavy cream with powdered sugar and vanilla until it holds stiff peaks. Get your serving plate ready and place it near your cake roll. Gently unroll chocolate cake and remove tea towel. [Try to get the tea towel to the hamper without touching anything, as it is saturated with smudgy cocoa and trust me, can mess up a white kitchen fast.] Spread whipped cream filling evenly over cake. Gently use waxed or parchment paper once again to reroll cake. Place on serving platter, seam side down.

If you're fancier than us, you can now garnish it with shaved white or dark chocolate or even a drizzle of each, melted; raspberries are pretty too. Serve immediately in 1-inch thick slices or refrigerate until needed. This cake is best to serve on the first day it is made. It's still delicious after that, but the whipped cream filling does begin to deflate a little into the cake spiral.
About this cake's origin/name: When I first wrote about this cake in 2007, I was unable to find the original New York Times article my mother had clipped the recipe from but after finding an almost exact match of my mother's recipe in a 2001 Gourmet, attributed the name and cake to it. Now that The New York Times online archives are in better order, I was able to find the actual article my mother read on a June day the year before I was born promising that you couldn't go wrong if you made this heavenly chocolate dessert on Father's Day. In this version, there are a bunch of minor changes, such as using coffee instead of water with the chocolate, vanilla extract in stead of Grand Marnier, and much less of it, more whipped cream filling (which I find unnecessary) but less sweetener in it (which I preferred) and the option to roll the cake from the short end, which my family always does. I prefer most of these original nuances, as that's the way my mother always made it, but give some hybrid suggestions above. Neither recipe origin recommends pre-rolling the cake with a towel, but I picked that tip up from various food blogs and find it essential in virtually eliminating cake cracks.

Wednesday, 15 January 2014

Snowballs, Lovely Houseguests & Baking on a whim for tea!


Hamde Uncle is a sporadic yet regular visitor. He visits almost every year from Bangladesh.
He adores my voice and I have been talking to him about bangla folk tracks to include in my singing venture whenever that materialises. We'd play scrabble over Facebook, share anecdotes, talk endlessly. He's visiting again!
This Sunday afternoon while we were lazing around, I lamented the lack of inspiration to bake while I was dying to, since my office work had JUST eased up and as he half snoozed through his cup of tea he exclaims "Oh the Russian tea cookies my mother's friend used to get us while we were at Princeton! Those were most delightful. Do you know how to make them?" Make them? This was the first I was hearing of them.
Fortunately I subscribe to plenty of online food blogs that send in posts via email every day. I neatly keep filing them away, never used any. I just tried an inbox search and Voila! What do you know!!? Snowballs, commonly known as Mexican wedding cookies or Russian tea cakes pops up by Brown Eyed Baker.
Excited we start the process. He gets me a bag of roasted, salted, Cashews since we didn't have any Pecans the recipe asked for and less than an hour later, Abracadabra!

Unbelievably scrumptious, snowballs were ready! He was elated to find them exactly the same taste as the ones he had through his teens. Mission accomplished. One happy guest.

So here's to celebrating those around me or the ones I come across. And food of course.
Don't forget baking!!

Here's the much celebrated recipe at ours from Brown Eyed Baker
More later


Snowball Cookies


Yield: About 48 cookies
Prep Time: 15 minutes
Cook Time: 18 minutes
Total Time: 45 minutes
A recipe for Snowball Cookies, shortbread-style cookies loaded with nuts and rolled in powdered sugar. They're also known as Mexican Wedding Cookies and Russian Tea Cookies.
Ingredients:
2 cups all-purpose flour
2 cups finely chopped pecans, divided
¾ teaspoon salt
1 cup (8 ounces) unsalted butter, softened but still cool
⅓ cup granulated sugar
1½ teaspoons vanilla extract
1½ cups powdered sugar, for rolling cookies after baking
Directions:
1. Preheat oven to 325 degrees F and adjust the oven racks to the upper- and lower-middle positions. Line two baking sheets with parchment paper or silicone baking mats.
2. Mix the flour, 1 cup of the chopped pecans, and the salt in a medium bowl; set aside.
3. Place the remaining chopped nuts in a food processor and process until they are the texture of coarse cornmeal, 10 to 15 seconds; stir into the flour mixture and set aside.
4. Cream the butter and sugar together on medium speed until light and fluffy, about 2 minutes. Beat in the vanilla, then scrape the sides of the bowl. Add the flour mixture and beat on low speed until the dough just begins to come together but still looks scrappy, about 15 seconds. Scrape the sides of the bowl again and continue beating at low speed until the dough is cohesive, about 10 more seconds.
5. Roll a heaping tablespoon of dough between the palms of your hands and place on the prepared baking sheets. The cookies will only spread a little bit, so you can place them fairly close together. Bake until the tops are pale golden and the bottoms are just beginning to brown, 17 to 19 minutes, rotating the baking sheets front to back and top to bottom halfway through the baking time.
6. Cool the cookies on the baking sheets for 2 minutes, then transfer them to a wire cooling rack and allow to cool to room temperature, about 30 minutes.
7. Place the powdered sugar in a large zip-top bag. Working with 3 or 4 cookies at a time, place them in the bag of sugar and gently toss to coat them thoroughly. Gently shake off any excess. Allow the cookies to sit for at least an hour, or up to overnight, and then repeat the process. Cookies can be stored in an airtight container at room temperature for up to 5 days.

(Recipe adapted from Baking Illustrated)